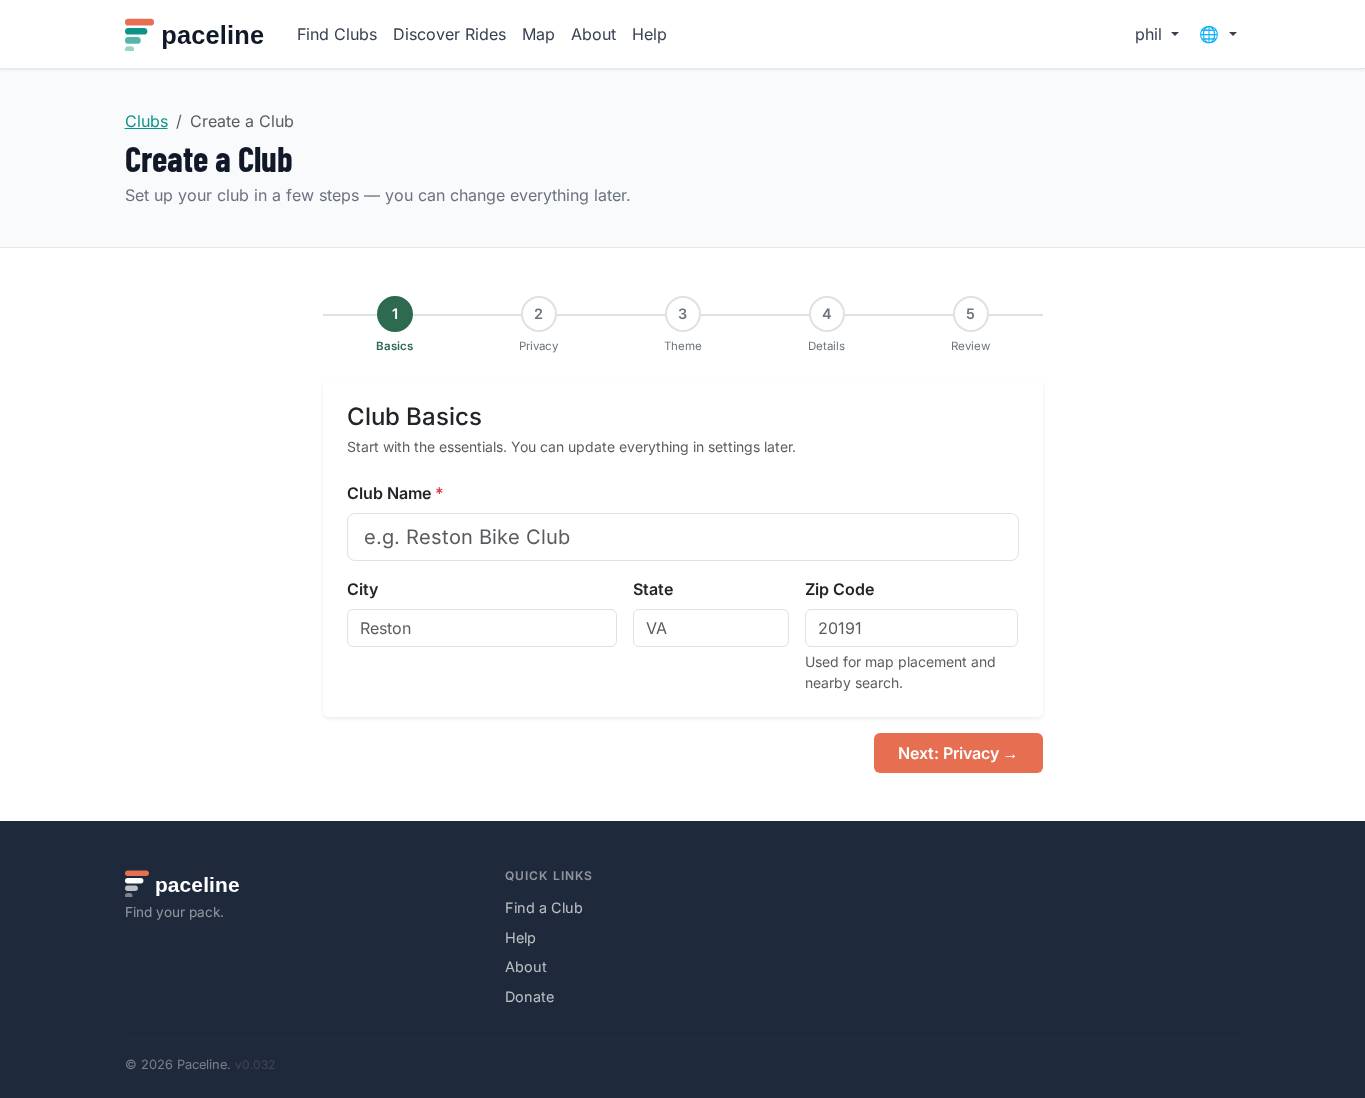
1. Create your club
Sign in, choose Create a Club, and enter the club name, city, state, and zip code. The zip code helps riders find your club on the map and in nearby searches.
Choose whether the club is public or private. Public clubs are easy for anyone to join. Private clubs are better when you want to approve or invite members before they participate.
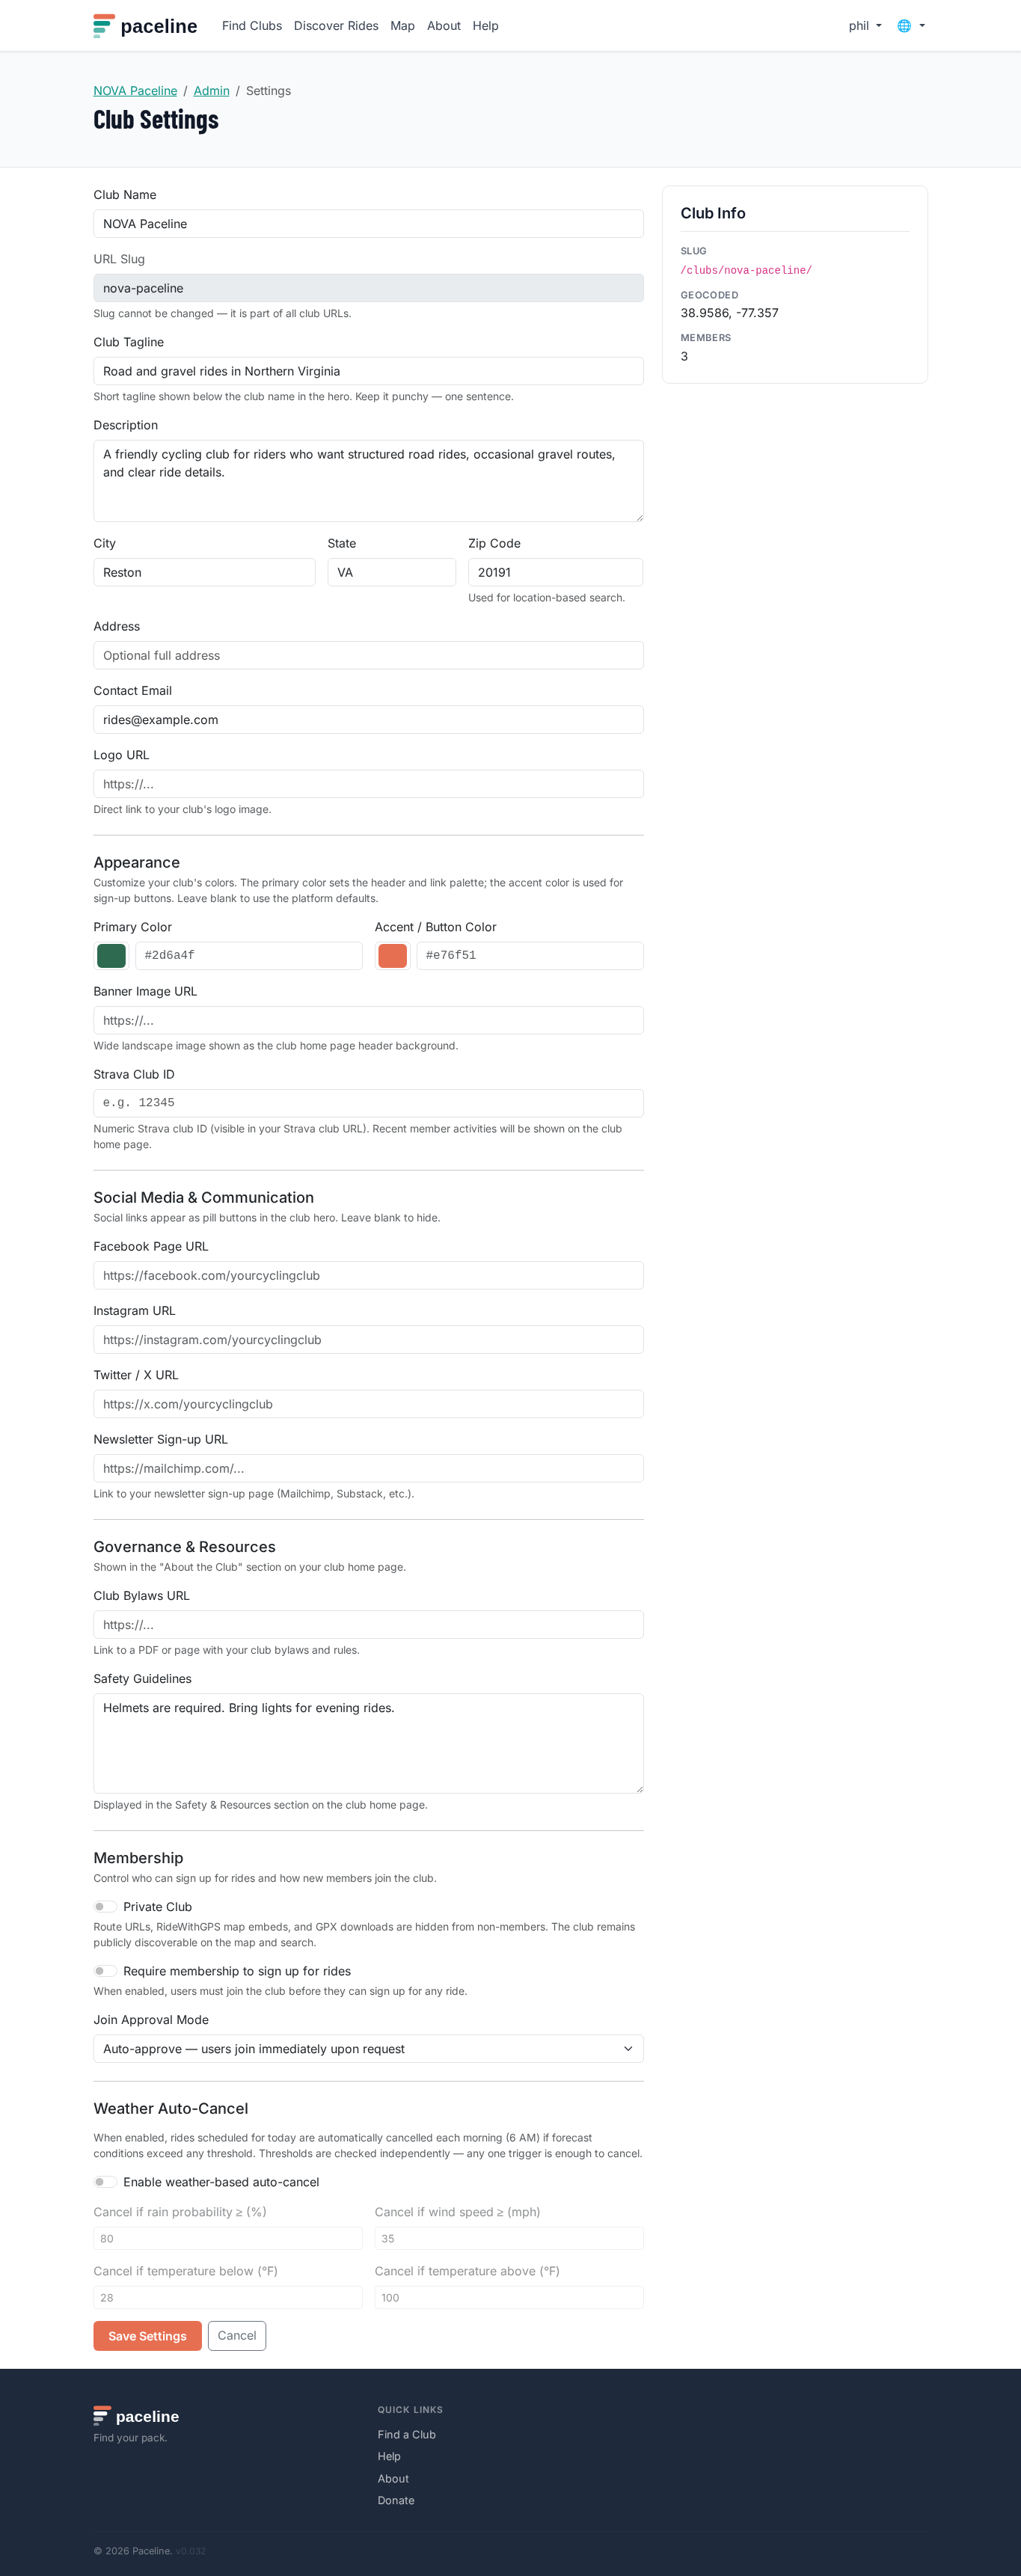
2. Complete club settings
From your club page, open Admin, then Settings. Add a tagline, description, contact email, logo, banner image, social links, membership settings, safety guidelines, and club bylaws if you have them.
Keep the description short and practical: who you are, where you ride, what pace groups you offer, and how new riders should get started.
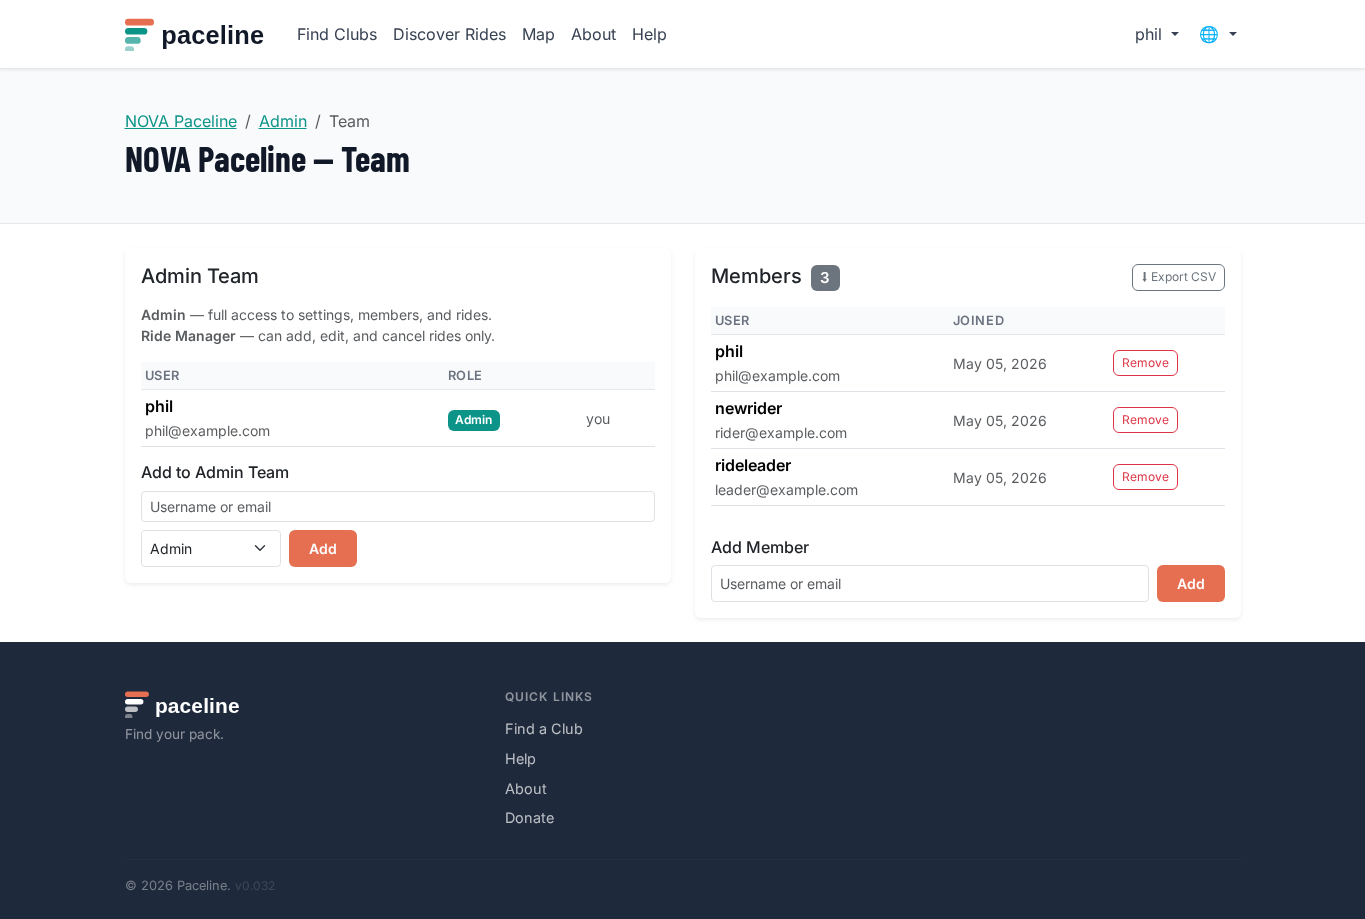
3. Add your management team
Open Admin, then Team. Add members by username or email and choose the right role:
- Admin: manages settings, members, rides, and content.
- Ride manager: creates and manages rides.
- Content editor: updates news posts and club content.
- Treasurer: views and exports member information.
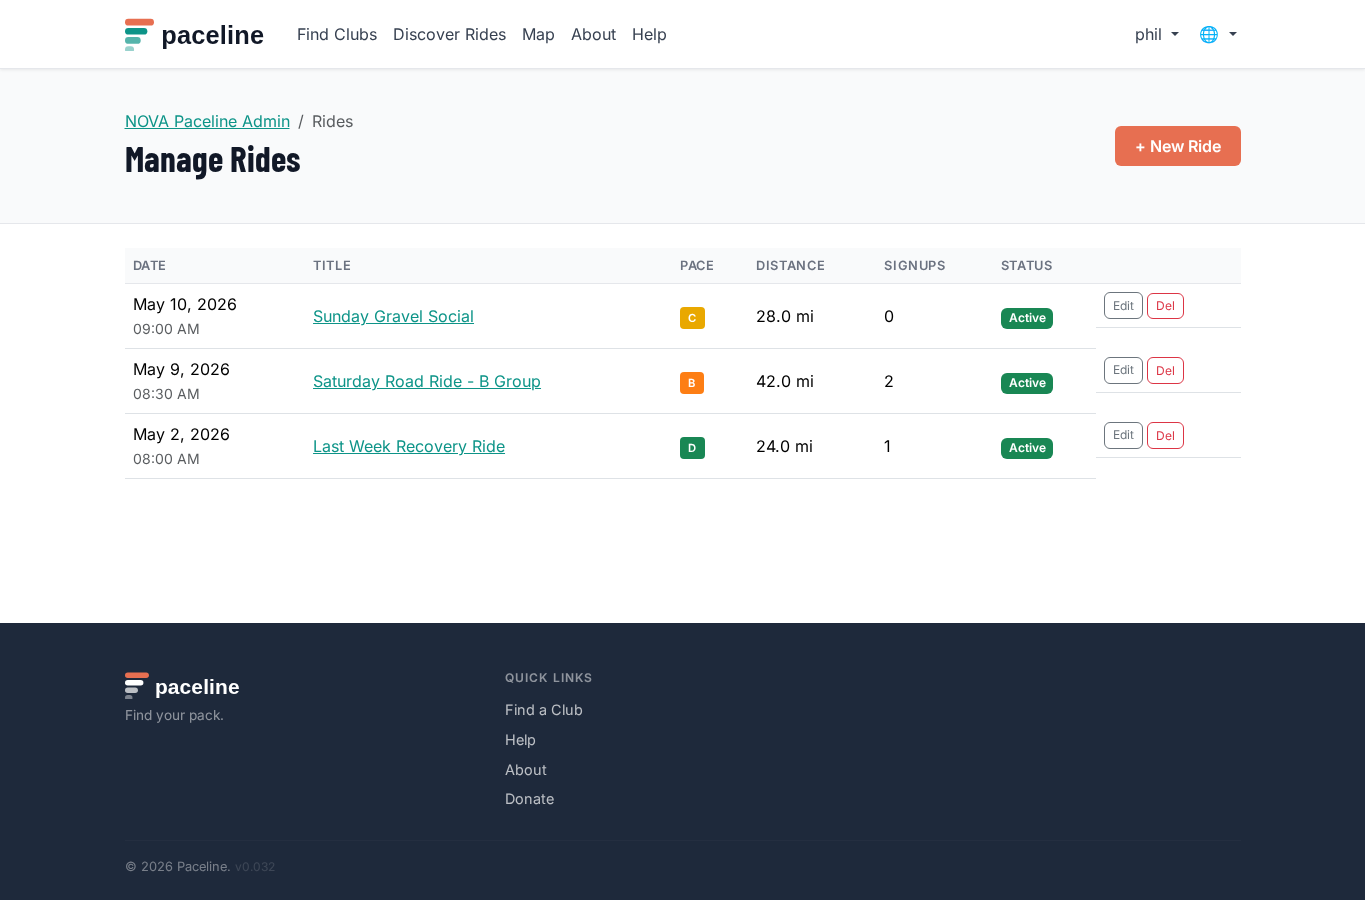
4. Publish rides
Go to Admin, then Rides, and choose New Ride. Add the ride title, date, start time, meeting location, distance, pace, ride type, leader, route link, and notes.
Use clear titles and notes. Include regroup expectations, drop/no-drop information, parking details, and anything riders should bring.
5. Manage signups and attendance
Open a ride from the admin ride list to view the roster. You can see who signed up, manage waitlists, and record attendance after the ride.
If a ride needs to be canceled, edit the ride and mark it as canceled. Riders will see the cancellation on the ride page.
6. Keep members informed
Use News from the admin dashboard for club announcements, schedule updates, event reminders, and other short updates.
7. Handle paid club dues
If your club collects dues, open Admin, then Settings, and enable paid dues under membership settings. Paste the payment link your club owns, such as a Stripe, PayPal, or Square hosted checkout link, and choose how many months a confirmed payment stays valid.
Paceline does not process club dues, hold funds, or take a cut of this money. Riders pay through your club-owned payment link. A club admin then confirms the payment from the Team page, which activates the rider's membership through the configured expiration period.
When importing an existing roster, add a paid-through date for the whole batch
or add dates per row using [email protected], 2026-12-31.